Night Stand Makeover Using Annie Sloan Chalk Paint
Have you heard of Annie Sloan Chalk Paint????
It is a girlie girl’s paint – no sanding, no priming – just painting.
This makes any project you want to do more manageable. This amazing paint also cuts your time in half, if not more. My total time spent painting my night stand was 19 minutes – that’s pretty awesome!!! I did it before I picked up my kids from school. How’s that for a productive afternoon?!
Here is the before:
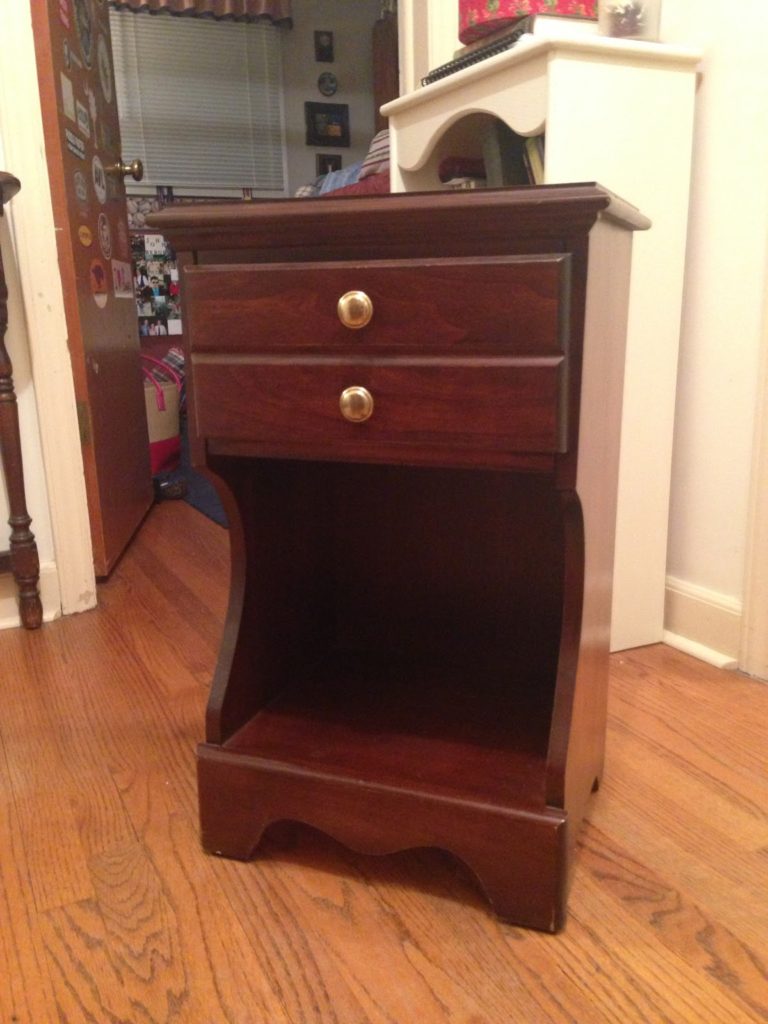
Plain. Laminate. Not exactly ugly, just not fit for a girlie girl who loves pink and green.

Coat #1: this color is on the lighter side, so two coats was necessary. Other colors offered need only one coat.
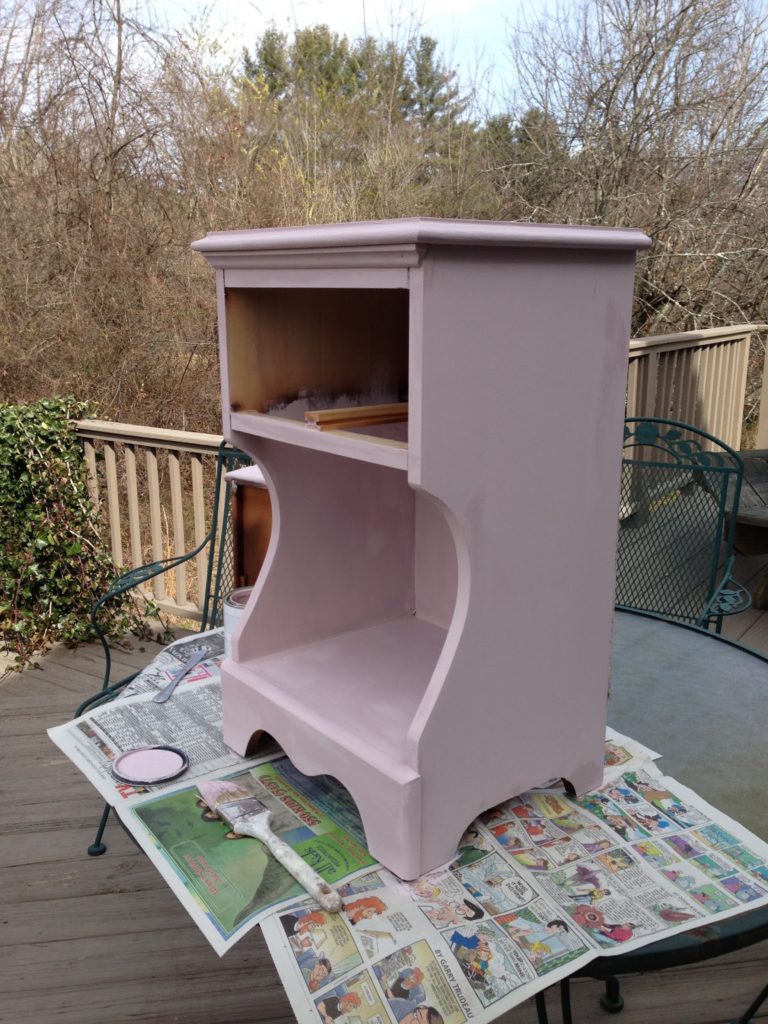
After coat #2: you can see where it’s a tinge darker in spots… that is where it hasn’t dried.
Dries in about 10-15 minutes. I was outside, and it was quite breezy, so it dried LOTS faster!
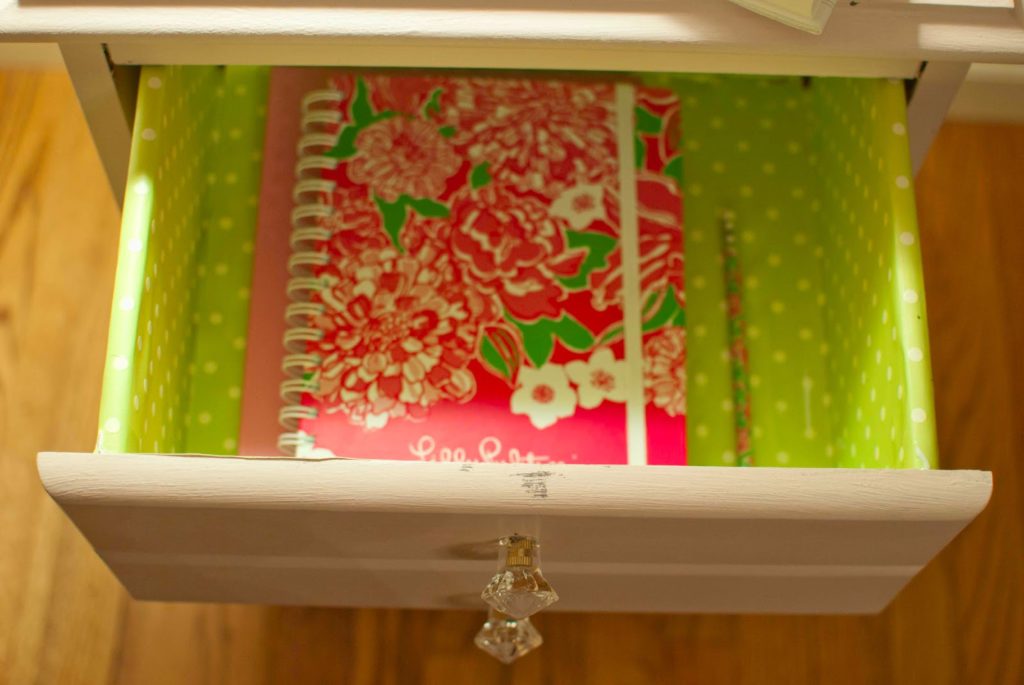
Next, I worked on lining the drawers:
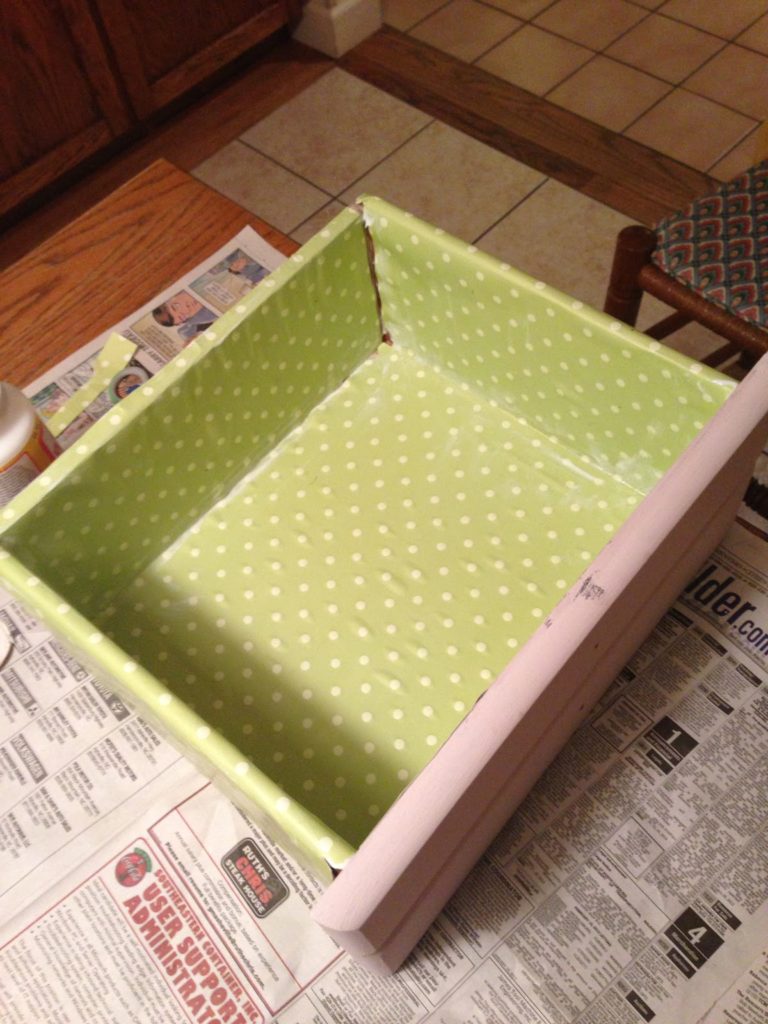

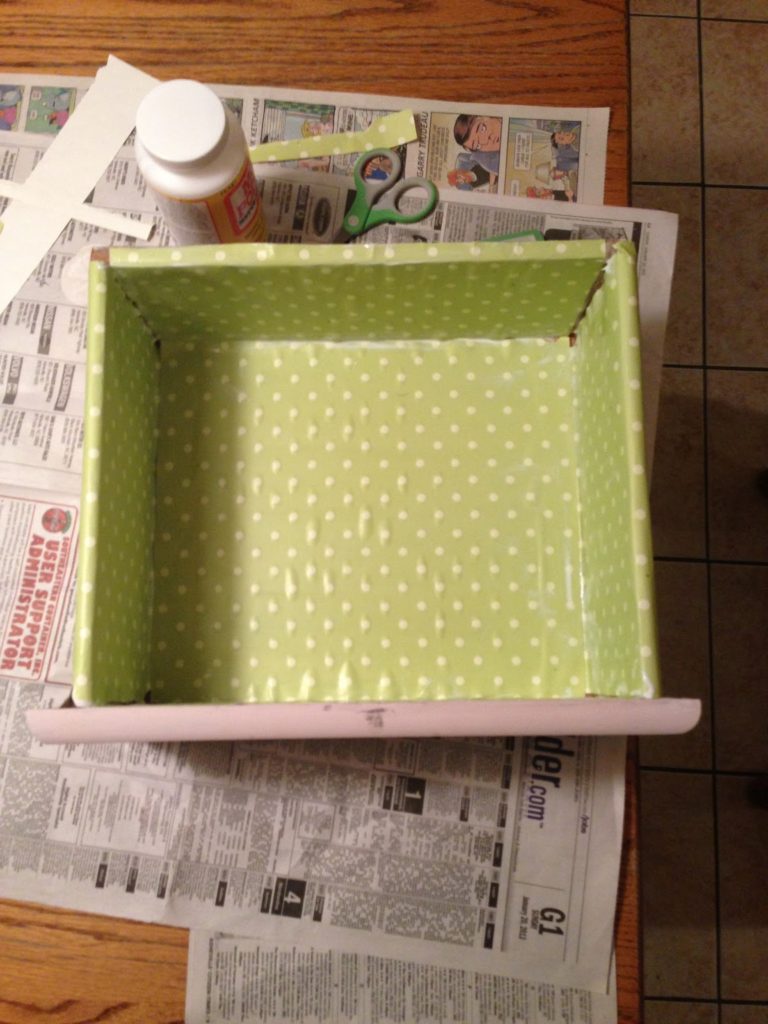
After cutting the paper to fit the drawer properly, I Mod Podged the entire drawer, then added the paper quickly. Smoothed it with a scraper, then added another light coat of Mod Podge.
The paper I chose was more textured than I should have used…. Each polka dot is raised, therefore adding an unnecessary air bubbles that I couldn’t get out! Oh, well! It’s inside the stand most of the time, so no one will notice but me. And, it doesn’t bother me!
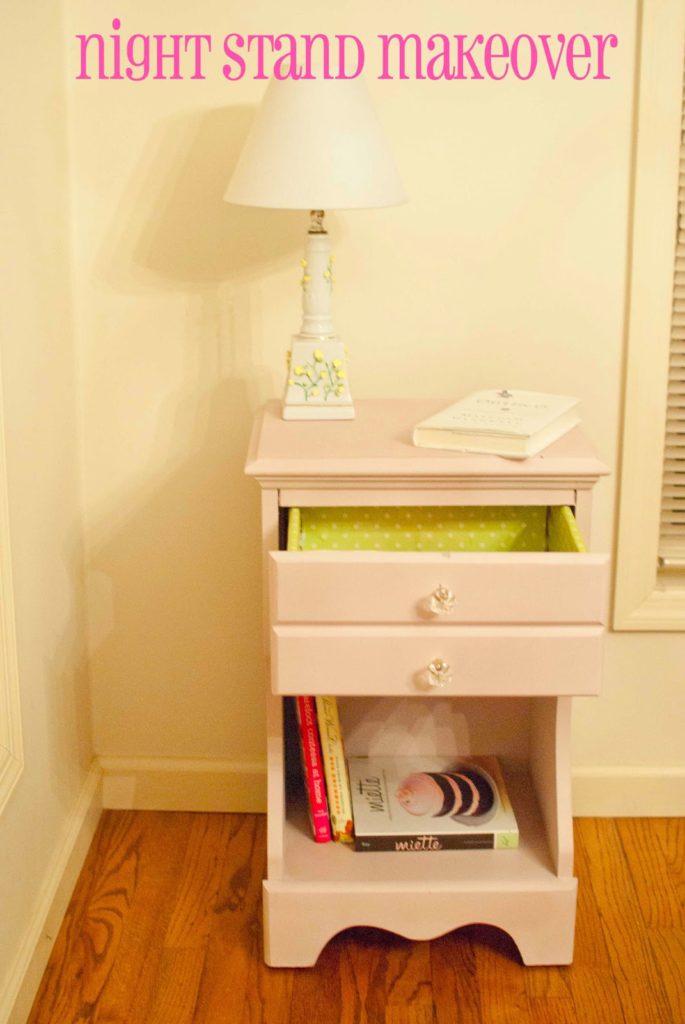
Here is the final product:
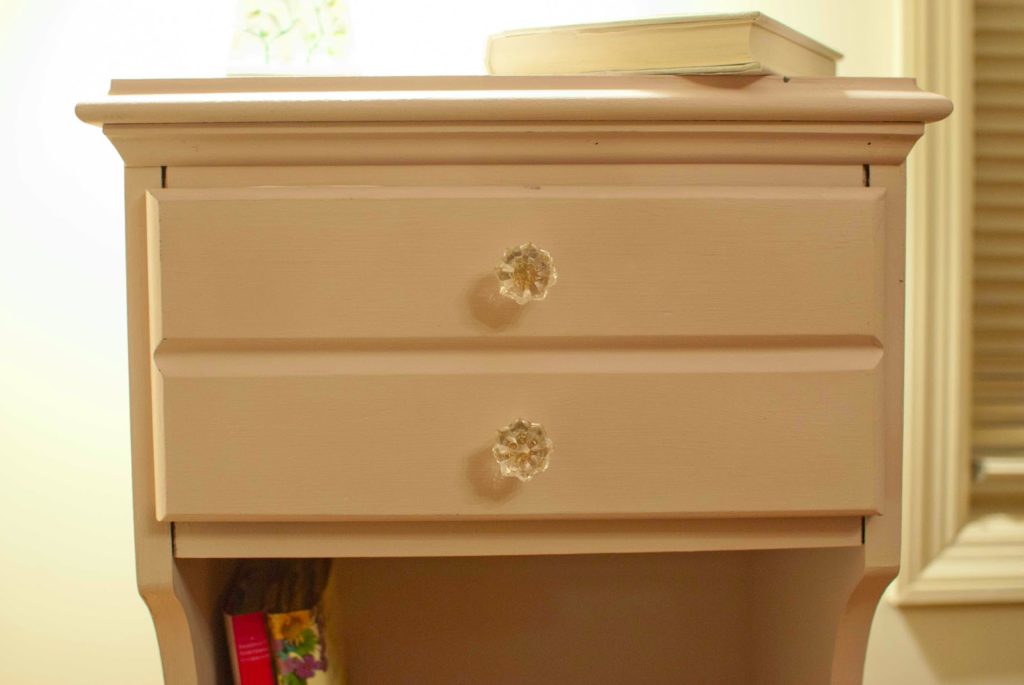
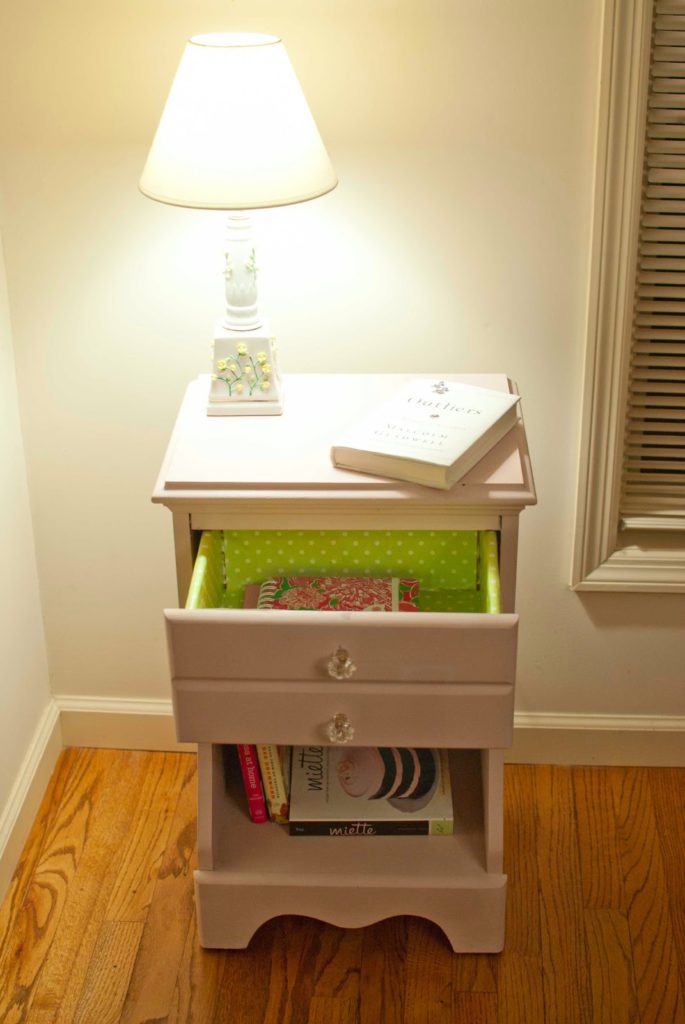

I’m excited to put it beside my bed, when my room is FINALLY all done. The ceiling is being re-done, yielding no use for quite some time….
I’m linking up to East Coast Creative for the kickoff of Creating with the Stars!!!


Hey Ashley, don't think I've posted before but I'm loving your blog from across the big blue! I have recently started to try and paint some old bedroom furniture but have only got as far as the bedside tables because it took soooo long with the sanding, priming, blah blah. So this recommendation is just perfect. Looks lovely too!
I have my heart set on refinishing an old chest that no longer fits in my bedroom as a toy box for my daughters room. I was putting it off because of the sanding. Now that I found this DIY, I won't have to procrastinate.
This is so cute!
Ashely,
You did a GREAT job!! I need to do this with my daughter's old lime-green night stand.